Installation
This document outlines the steps to install WP Bones for the first time. It covers setting up a local WordPress installation, creating a plugin using boilerplate templates, installing necessary packages, and verifying the installation. It also includes tips for using GitHub templates and cloning repositories.
First time installation
Create your local WordPress installation
First of all, you should prepare the development environment. I may suggest the following:
I suggest you also use PHP Monitor , a lightweight, native Mac menu bar app that works best when accompanied by Laravel Valet (but it also works without it).
To start developing a WP Bones plugin, you must have a copy of WordPress files. You can download the latest WordPress release from wordpress.org .
Create your plugin
To create your WP Bones plugin, you can use one of our ready-made boilerplate templates available on GitHub. You can choose one of the following:
- WPKirk Boilerplate - this is the base template, without examples inside, recommended for experienced users.
You can choose to create your repository on GitHub using the available templates or clone the repository directly to your computer.
By using the GitHub template
On GitHub, you can create a new repository using the WPKirk Boilerplate by clicking on the “Use this template” button on the repository page.

Clone from GitHub
You may also clone the repository using either the Git command line or the GitHub for Mac application.
Change the directory to the wp-content/plugins folder of your local WordPress installation.
cd wp-content/pluginsThe simple boilerplate
git clone -b main https://github.com/wpbones/WPKirk-Boilerplate.git <your plugin folder>If you have cloned the repository instead of using the GitHub template, you should remove the .git folder before creating your own Git repository.
So run
rm -rf .gitInstall the necessary packages to compile the assets
From within your plugin folder, run:
npm installTake a look at the Assets section to learn more.
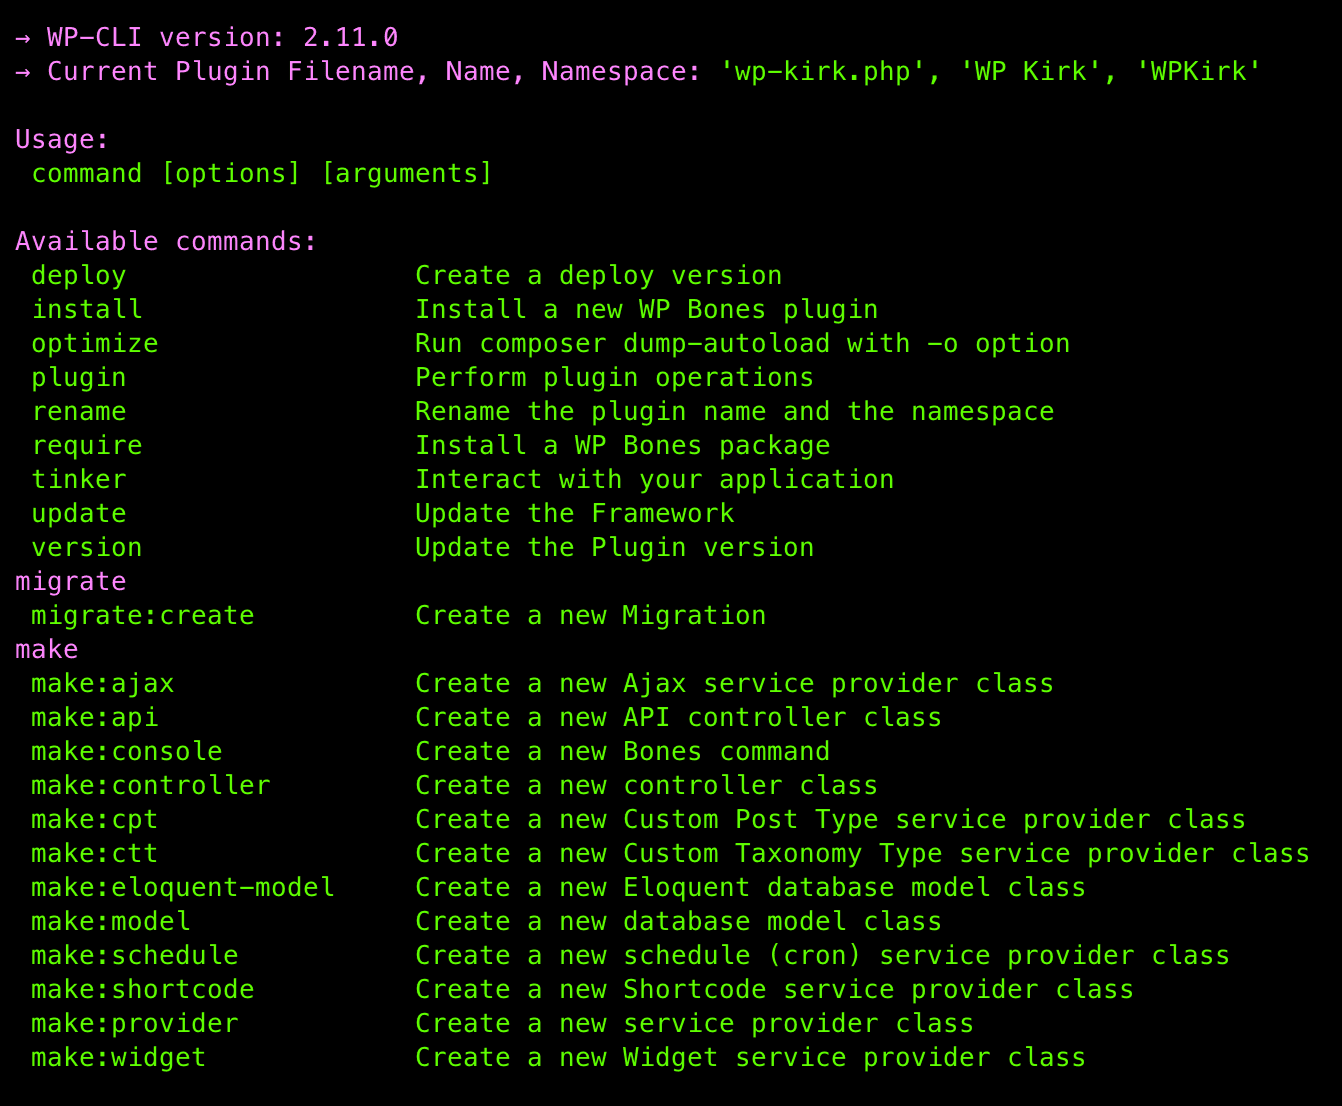
Check the installation
Next, from inside your plugin folder, try to run:
php bonesYou should see:

Install
Finally, install the WP Bones Framework inside the plugin:
php bones installAwesome! You are ready to start developing your first WP Bones plugin. 🤩
 Nextra